Whether you’re a hobbyist staring at a circuit schematic or a homeowner wandering the electrical aisle of a hardware store, you’ve likely run into a confusing naming conflict. You need a switch that controls a light from two different doors, but the box says “3-way” while your diagram says “SPDT.”
This article bridges that gap, clarifying the terminology and providing a practical guide to selecting and installing the right hardware so you can move forward with your project safely and confidently.
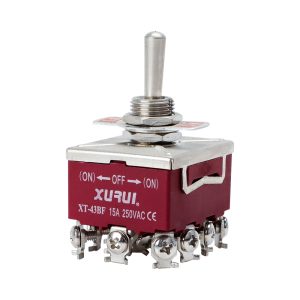
Decoding Switch Terminology: SPDT vs. 3-Way
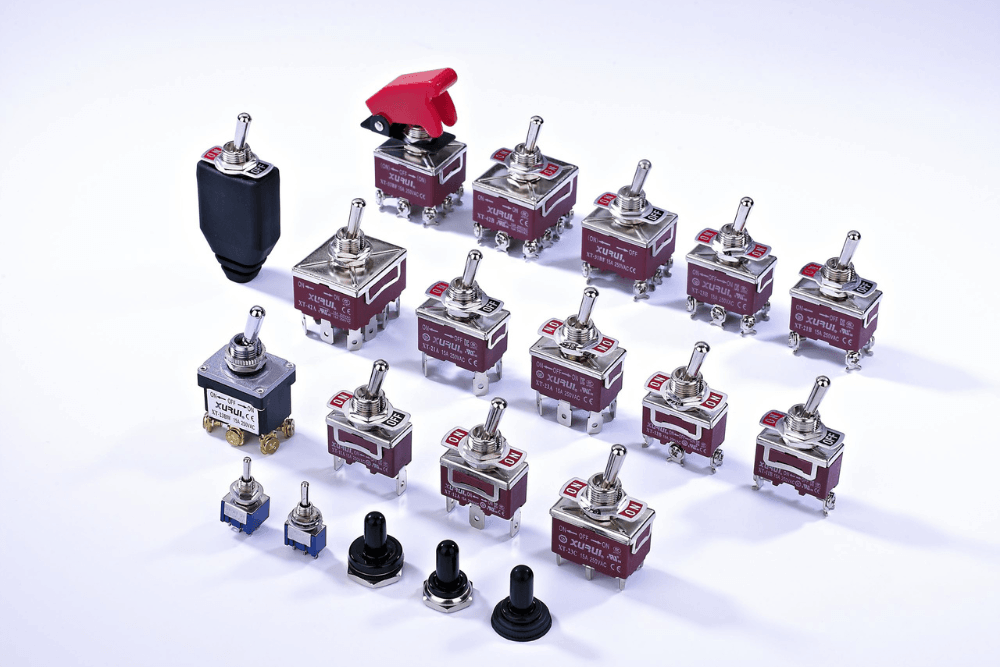
At their core, a Single-Pole Double-Throw (SPDT) toggle switch and a residential 3-way switch are electrically identical. The difference is purely linguistic: “SPDT” is the technical term used by engineers and electronics enthusiasts, while “3-way” is the trade name used by North American electricians for household wiring.
Understanding the Internal Mechanism
An SPDT/3-way switch features one “Common” terminal and two “Traveler” terminals. Think of it like a railroad switch: power comes in through the common track and can be diverted to one of two different departing tracks. Because there is no fixed “OFF” position in the internal mechanism of an SPDT toggle switch—it is always connected to one of the two travelers—it requires a second switch at the other end of the circuit to actually break or complete the flow of electricity to the light.
Identifying Terminals on Different Models
When you buy a standard wall switch, the packaging often focuses on residential terms rather than technical specs. To identify an SPDT toggle switch correctly in a home setting, look for these physical cues:
- The Common Screw: Usually darker than the others (often black or copper).
- The Traveler Screws: Usually brass-colored and located opposite each other.
- The Ground Screw: Green, located on the metal strap of the switch.
- Toggle Markings: Unlike a standard single-pole ON/OFF switch, the face of a 3-way toggle switch will be blank. It has no “ON” or “OFF” embossed on the plastic because its “up” position might be “on” or “off” depending on the state of the other switch in the room.
Practical Selection Guide for Your Project
Choosing the right switch involves more than just matching the pole count. You need to ensure the hardware is rated for your specific environment and load.
Matching the Switch to the Load
Before purchasing, check the amperage and voltage ratings stamped on the side of the switch frame.
- Residential Lighting: Most home lighting circuits are 15 Amps. If you are on a kitchen or laundry circuit, you might need a 20 Amp switch.
- Voltage: Ensure the switch is rated for at least 120V for standard North American outlets.
- Dimming Compatibility: If you are using LED bulbs, ensure you buy a “3-Way LED Dimmer.” Standard older dimmers often cause LEDs to flicker or hum when wired in a 3-way configuration.
Evaluating Build Quality and Type
Not all switches are created equal. Depending on where the switch is going, consider these “pro-tip” upgrades:
- Commercial Grade: If the switch is in a high-traffic area (like a garage or mudroom), spend the extra two dollars for a “Commercial Grade” unit. They have sturdier internal springs and better terminal clamps.
- Decora vs. Toggle: While the modern Decora (large flat rocker) style is popular, a traditional toggle switch is often preferred for its classic look and distinct tactile feedback.
- Weather Resistance: If the switch is outdoors or in a very damp shed, look for a WR (Weather Resistant) rating to prevent internal corrosion of the contact points.
Step-by-Step Installation Checklist
Once you have the right part, follow this checklist to ensure a “one-and-done” installation without the frustration of the light working “backward.”
Pre-Installation Safety and Prep
- Power Verification: Turn off the breaker and use a non-contact voltage tester to ensure the box is truly “cold.”
- Label the Common Wire: Before disconnecting the old switch, find the wire attached to the darkest screw. Tape it with a piece of electrical tape. This is the most common mistake—if you mix up the common wire with a traveler on your new toggle switch, the circuit won’t work correctly.
- Check Box Fill: 3-way boxes are often crowded with extra wires. Ensure your wires are tucked neatly to the back to avoid pinching the insulation when you screw the switch into the junction box.
Troubleshooting the Final Connection
If you finish the install and the light only works when one switch is in a specific position, you likely have a “dead traveler” issue.
- Check the Common: Ensure the black/copper screw is connected to the “Hot” feed or the “Load” (the light).
- Consistency: Ensure the travelers (usually red and black wires in the same cable) are connected to the brass screws on both ends of the run.
- Grounding: Even though the switch functions without a ground, always connect the green screw to the bare copper house wire for safety and to meet modern electrical codes.
Related Reading: Differences Between a Rocker Switch and a Toggle Switch
Final Thoughts
Navigating the crossover between industrial terminology like “SPDT” and residential “3-way” wiring doesn’t have to be a source of frustration. While the names differ across technical manuals and hardware store aisles, the underlying physics remains the same. By understanding how the common and traveler terminals work together, you can confidently select the right toggle switch for your project, ensuring both functional convenience and electrical safety.
Whether you are restoring a classic look with a traditional toggle or mapping out a complex multi-location circuit, the key to success lies in preparation. Always prioritize safety by verifying power is off, and take the extra moment to label your common wires. With these simple steps, you’ll turn a potentially confusing electrical task into a straightforward, successful DIY win.
Frequently Asked Questions
Can I use a 3-way switch as a regular single-pole switch?
Yes. If you only connect the Common and one of the Traveler terminals (leaving the third screw empty), your 3-way toggle switch will function as a standard ON/OFF switch.
What is the difference between a 3-way and a 4-way switch?
A 3-way switch (SPDT) is for controlling a light from two locations. A 4-way switch (DPDT) is used in the middle of a circuit to control a light from three or more locations.
Why is it called a “3-way” switch if it only has two locations?
The “3” refers to the three electrical terminals on the device, not the number of locations. In the UK and Europe, these are more logically called “2-way” switches.
Do I need special wire for a 3-way switch?
Yes, you typically need 14/3 or 12/3 cable between the two switches. This cable includes an extra “traveler” wire (usually red) that isn’t found in standard 2-wire cables used for basic toggle switch setups.
Does it matter which traveler wire goes to which traveler screw?
No. As long as the “Common” wire is on the correct dark screw, the two traveler wires can be swapped between the two brass screws without affecting the operation of the circuit.
XURUI Engineering Team