Wiring a Solid State Relay (SSR) sounds simple until you hit the common traps: mixing up input vs output, choosing the wrong SSR type (AC vs DC), skipping protection parts, or mounting it with no heat sinking. This guide gives you a clear, repeatable wiring method plus checklists and troubleshooting steps so your SSR switches reliably without overheating, sticking “ON,” or blowing fuses.
Understand What You’re Wiring Before You Touch A Screwdriver
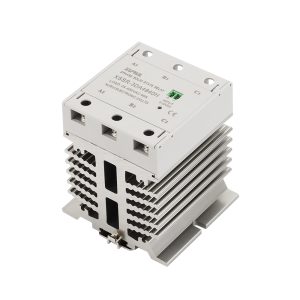
Identify SSR Type And Labeling
Goal: Prevent the #1 failure: using the wrong SSR (or wiring the wrong side).
Do this first (30 seconds):
- Find the INPUT markings (often + / – or 3–32VDC, 4–20mA, etc.)
- Find the OUTPUT markings:
- AC output SSR usually shows ~ ~ and a load spec like 24–380VAC
- DC output SSR shows + / – and a load spec like 5–220VDC
- Confirm your load type:
- Resistive load: heaters, heating elements
- Inductive load: motors, solenoids, transformers (needs extra protection + derating)
Quick rule:
- DC control + AC load is the most common: PID/PLC drives SSR input; SSR switches AC heater load.
Label sanity check:
- If the output side shows ~, it’s for AC loads
- If the output side shows +/-, it’s for DC loads
Plan The Switching Method And Power Path
Goal: Decide what the SSR will actually interrupt (line/hot vs neutral) and where protection sits.
Best practice (typical AC systems):
- Switch the hot/line conductor, not neutral.
- Put protection upstream so a fault opens safely.
Sketch the power path:
- Power source (AC mains or DC supply)
- Fuse/breaker
- SSR output in series with load
- Load
- Return path (neutral or DC negative)
Gather Parts And Tools That Make The Wiring Safe And Stable
Use A Wiring And Safety Checklist
Minimum recommended parts (typical AC heater control):
- SSR (correct current/voltage type)
- Heat sink (sized for SSR current) + thermal paste/pad
- Fuse or breaker (properly rated)
- Enclosure (non-conductive or grounded metal)
- Proper wire gauge, ring/fork terminals, strain relief
- Screwdriver, torque driver if available, multimeter
Strongly recommended add-ons (especially for mains and inductive loads):
- MOV (surge suppressor) across AC line (protects from spikes)
- RC snubber for inductive loads (reduces false triggering and stress)
- Contactor + SSR combo for high-risk/high-power loads (SSR for switching, contactor for hard isolation)
Wire The SSR Input Side The Right Way
Connect Control Signal Without Guessing Polarity
Goal: Make sure the controller can actually trigger the SSR.
Steps (DC control input SSR — most common):
- Power off everything.
- Locate SSR input terminals (+ and –).
- From your controller output:
- Connect controller + to SSR +
- Connect controller – to SSR –
- If using a PLC/PID:
- Confirm whether the output is DC pulse, voltage, or current.
- Match it to SSR input rating (example: 3–32VDC input SSR works with many controllers).
Checklist to avoid silent failure:
- Controller output type matches SSR input (voltage vs current output).
- Control voltage meets SSR input minimum (some SSRs need more than “weak” signals).
- Control wiring is separated from mains wiring (reduce noise and risk).
Verify The Controller Output Before You Connect The Load
Goal: Avoid powering mains only to find the control side wasn’t working.
Quick test:
- With load disconnected, power the controller and trigger “ON.”
- Measure voltage across SSR input terminals:
- You should see a value inside the SSR input range (example: 5–12VDC if controller is 12V output).
- If the SSR has an indicator LED, confirm it lights when commanded ON.
Wire The SSR Output Side For AC Loads
Switch The Hot Conductor And Keep The Load In Series
Goal: Prevent “always hot” load wiring and reduce hazard.
Steps (AC output SSR controlling an AC heater):
- Power off and verify with a meter.
- Identify the hot/line conductor from mains.
- Place the SSR output in series with the load on the hot line:
- Hot (L) → Fuse/Breaker → SSR Output Terminal 1 → SSR Output Terminal 2 → Load → Neutral (N)
- Keep neutral un-switched (typical) and continuous back to source.
Common mistake to avoid:
- Wiring SSR output across line and load in parallel (that won’t switch correctly and can be dangerous).
Add Protection Components In The Right Locations
Goal: Prevent blown SSRs and nuisance trips.
Protection placement (simple and effective):
- Fuse/breaker: upstream of SSR on the hot line
- MOV: across L–N (or across load supply) inside enclosure
- Snubber: across SSR output or across the load (especially inductive)
Load-based checklist:
- Resistive heater: fuse + heat sink (usually enough)
- Fan motor/solenoid: fuse + heat sink + MOV + snubber, consider contactor
Wire The SSR Output Side For DC Loads
Maintain Polarity And Avoid Backfeeding
Goal: DC SSR wiring is polarity-sensitive in many designs.
Steps (DC output SSR controlling DC load):
- Confirm SSR output is rated for DC switching (output marked +/-, load spec in VDC).
- Wire in series on the positive side (common practice):
- DC + → Fuse → SSR Output + → SSR Output – → Load + → Load – → DC –
- Keep polarity consistent with SSR markings.
Checklist:
- SSR output polarity matches DC supply and load direction.
- Include flyback protection if load is inductive (diode or snubber depending on design).
Prevent Overheating And Premature Failure
Mount The SSR Correctly With Heat Management
Goal: SSRs fail most often from heat, not wiring.
Steps:
- Mount SSR to an appropriate heat sink (flat contact).
- Use thermal paste/pad to improve transfer.
- Ensure airflow in enclosure (vents or fan if needed).
- Keep SSR away from other heat sources (transformers, heaters, power resistors).
Heat checklist:
- SSR mounted firmly (no gaps).
- Heat sink not enclosed in stagnant hot air.
- Current is derated if ambient is high.
Size The SSR And Fuse Based On Real Load Behavior
Goal: Avoid “rated on paper” failures.
Practical sizing rules (safe habits):
- Choose SSR current rating with margin:
- For heaters: often 2–3× the steady current is a safer selection habit.
- For motors/transformers: margin must be larger due to inrush.
- Use a proper fuse:
- Match to load current and inrush behavior.
- Don’t “solve” blowing fuses by oversizing blindly—address inrush and protection.
Quick technique:
- Calculate load current:
- AC: I = P / V
- DC: I = P / V
- Then add headroom + account for enclosure temperature.
Related Reading: Do Solid State Relays Need a Heatsink?
Validate Wiring Before Full Power
Perform A Pre-Power Checklist And Meter Test
Goal: Catch mistakes before they become smoke.
Pre-power checklist:
- Input wiring: correct polarity, correct control voltage.
- Output wiring: load in series, correct line conductor switching.
- Protection: fuse installed, enclosure grounded if metal.
- Mechanical: terminals tight, no exposed copper, strain relief installed.
- Separation: low-voltage control wires routed away from mains.
Meter checks:
- Continuity: verify intended series path through SSR output and load.
- Insulation: ensure no short between hot and ground/neutral where it shouldn’t be.
Fix The Most Common SSR Wiring Problems
Address “Always On,” “Never Turns On,” And “Ghost Voltage”
SSR “Always On” (common causes + fixes):
- Wrong SSR type (AC SSR used for DC load) → replace with DC SSR.
- Output wired incorrectly (bypassing SSR) → rewire series path.
- Inductive spikes causing latch/stress → add MOV/snubber, consider contactor.
SSR “Never Turns On”:
- Control output not matching SSR input → verify controller output type and voltage.
- Polarity reversed on DC input → swap +/-
- SSR damaged by overheating → fix heat sink + replace SSR
“Off But Still Shows Voltage” (ghost/leakage):
- SSRs can leak small current; meters can show phantom voltage.
- Confirm with a real load or add a bleeder resistor (application-dependent).
- If LEDs glow faintly, leakage is often the reason, not “bad wiring.”
Handle Overheating, Trips, And Blown Fuses
Overheating:
- Add or upgrade heat sink, improve airflow, derate current, retorque terminals.
Breaker trips or fuse blows:
- Inrush too high → larger SSR margin + correct fuse type + surge protection.
- Short/incorrect wiring → re-check series wiring and insulation.
Conclusion
Wiring an SSR is straightforward if you stick to the essentials: match AC/DC type to your load, wire the load in series (usually on the hot/line), add a fuse and basic surge protection, and mount the SSR on a proper heat sink. Before powering up, run a quick polarity and continuity check with a meter. Do that, and your SSR will switch reliably without overheating or “sticking on.”
XURUI Engineering Team