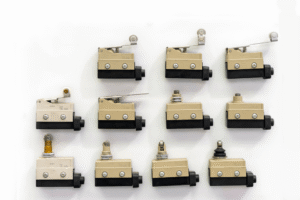
Limit Switch Testing Guide: How to Diagnose, Test, and Decide What to Do Next
When a machine won’t stop, won’t start, or behaves unpredictably, the limit switch is often the first component to check.
This Limit Switch Testing Guide shows you how to quickly test a limit switch, understand the results, and decide what to do next. Read on to avoid misdiagnosis and unnecessary downtime.
LIMIT SWITCH TESTING AT A GLANCE
| Situation | Recommended Test | What It Tells You |
| Machine won’t stop or start | Continuity test | Confirms contact function |
| Intermittent operation | Mechanical + resistance test | Identifies wear or corrosion |
| Furnace shutting down | Live function test | Verifies thermal response |
| New switch installation | Pre-install continuity test | Prevents DOA installation |
What Does a Limit Switch Actually Do?
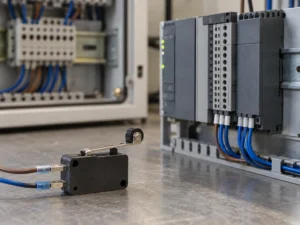
Think of a limit switch as a sentry. Its job is to detect the presence (or absence) of an object and tell your machine what to do next. It is an electromechanical device that translates physical motion into an electrical signal.
They are everywhere, serving three main purposes:
- Safety Stops: Preventing a machine from moving too far and breaking itself (or hurting you).
- Position Sensing: Telling a system, “I am in position, you can start the next step.”
- Emergency Cutoffs: Like in your furnace, shutting down the burners if things get too hot.
Why Do They Fail?
Limit switches take a beating. They are mechanical devices that get physically hit, pushed, or heated thousands of times.
- Mechanical Wear: The spring gets tired, or the lever gets loose.
- Environmental Damage: Dust, oil, and moisture gunk up the electrical contacts.
- Contact Burn: Electrical arcing can pit the metal contacts, causing “ghost” signals.
Related Reading: Is A Limit Switch AC Or DC?
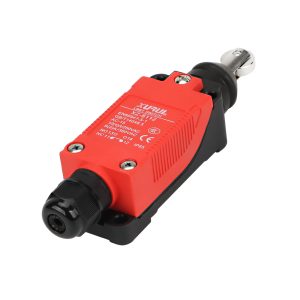
Step-by-Step: How to Test a Limit Switch with a Multimeter
Testing is straightforward, but safety comes first. Unless you are doing a specific live-voltage test, always turn off the power to the machine before starting.
Tools You Need
- Digital Multimeter
- Insulated Test Leads
- Small Screwdriver (to access terminals)
Step 1: The Mechanical “Click” Test (Don’t Skip This!)
Before grabbing the meter, use your ears and fingers.
- Visually inspect the switch. Is it cracked? Is the mounting loose?
- Manually push the lever or plunger.
- Listen: You should hear a distinct, crisp click.
- Feel: The action should be smooth, not gritty or sticky.
Pro Tip: If the lever sticks or doesn’t click, the mechanical spring is likely broken. No amount of electrical testing will fix that—you need a new switch.
Step 2: Identify Your Terminals (NO vs. NC)
This is where most people get confused. Most limit switches have three terminals:
- COM (Common): The ground or power source connection.
- NO (Normally Open): Like a light switch that is OFF. The circuit is broken until you hit the switch.
- NC (Normally Closed): Like a drawbridge that is DOWN. The circuit is active (connected) until you hit the switch to break it.
Step 3: The Continuity Test (The Primary Check)
Set your multimeter to the Continuity mode (look for the sound wave symbol).
Testing Normally Closed (NC):
- Place probes on COM and NC.
- Result: You should hear a beep (continuity).
- Action: Press the switch lever. The beep should stop.
Testing Normally Open (NO):
- Place probes on COM and NO.
- Result: Silence (no continuity).
- Action: Press the switch lever. You should hear a beep.
** The Verdict:** If the meter doesn’t react exactly as described above, your contacts are fried. Replace the switch.
Step 4: The Resistance Test (For Intermittent Problems)
Does your machine work sometimes but fail others? A simple beep test isn’t enough.
- Set your multimeter to Ohms (Ω).
- Touch the probes to the closed circuit (COM and NC).
- Reading: It should be close to 0.0 Ω.
- Trouble: If you see readings jumping around (e.g., 10Ω, 50Ω, or fluctuating), your contacts are dirty or pitted. This high resistance confuses the machine’s control board.
Special Case: Testing a Furnace Limit Switch
The furnace limit switch is a critical safety device that prevents overheating.
If your furnace blower runs constantly or the burners shut off too early, follow this procedure:
- Warm it up: Run the furnace until it’s warm.
- Trigger the cycle: Lower the thermostat suddenly to shut off the burner.
- Listen: You should hear the fan continue to run to cool down the heat exchanger.
- Multimeter Check: With power OFF and wires disconnected, test for continuity across the terminals. A triggered (overheated) limit switch should show an Open Loop (OL) or no continuity. It should only close (show continuity) once it cools down.
Note: If your furnace limit switch trips repeatedly, it’s rarely the switch’s fault. Check your air filters and vents—blocked airflow is the #1 killer of furnace limit switches.
Decision Time: Repair or Replace?
When to Adjust (Repair):
- The multimeter tests pass perfectly.
- The actuator arm isn’t physically hitting the target (misalignment).
- The switch is loose on its bracket.
- Fix: Tighten the bolts and adjust the arm angle.
When to Replace:
- Continuity is dead or inconsistent.
- The resistance reading is high.
- There is visible corrosion or the plastic housing is cracked.
- The mechanical “click” is gone.
- Fix: Don’t try to open the housing to clean the contacts. Limit switches are sealed and inexpensive. Just replace it.
Frequently Asked Questions (FAQ)
Q: Can I bypass a limit switch to keep my machine running? A: Only for temporary testing to confirm the switch is the problem. Never leave a jumper wire in place permanently. It removes a critical safety feature and can cause catastrophic machine damage or fire.
Q: My switch clicks, but the machine won’t move. Is the switch good? A: Not necessarily. The “click” is mechanical. The electrical contacts inside could still be burned out. You must verify with a multimeter.
Q: How do I know if my furnace high limit switch is bad? A: If the furnace overheats but the switch doesn’t cut the burners, or if the burners won’t light even when the furnace is cold (and the switch is stuck open), the switch is bad.
Final Thoughts
Did this guide help you solve your machine issues? Proper diagnosis saves time and money. If you found a bad switch, grab the part number off the side and order a replacement—it’s one of the easiest DIY repairs you can do.
XURUI Engineering Team