If you’ve ever tried to automate a process — like switching a heater, motor, or pump — you might have heard of current-sensing relays and solid-state relays (SSR), but wondered: how do these two actually work together? Many makers, engineers, and DIYers struggle with selecting the right parts, wiring them correctly, and avoiding false triggers that waste energy or damage components.
This guide breaks it all down into simple, step-by-step instructions. By the end, you’ll know how to choose the right devices, wire them safely, and troubleshoot common problems — so you can get a reliable, cost-effective solution that works every time.
| Option | Power Needed? | Speed | Typical Use Case |
| Current Sensing Relay | No extra power supply (uses line current) | Moderate | Detect when a load turns on/off |
| Solid State Relay (SSR) | Low-voltage control signal | Fast | Switch AC/DC loads silently & reliably |
Understanding the Basics
What Is a Current Sensing Relay?
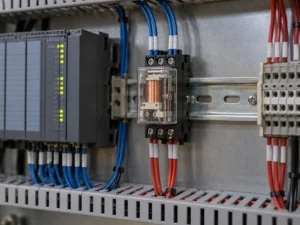
A current-sensing relay monitors the current flowing through a circuit. When the current reaches a set threshold, it closes or opens its internal contacts. This allows you to trigger another device — in this case, an SSR — without requiring a separate control circuit or PLC.
Key features to know:
- Adjustable trip points (set the current that triggers action)
- Normally open (NO) or normally closed (NC) contact options
- AC or DC sensing versions
What Is a Solid State Relay?
A solid state relay (SSR) is an electronic switch with no moving parts. Instead of mechanical contacts, it uses semiconductor components to control current flow. When a small control signal is applied, it instantly activates the circuit and switches the connected load on or off with speed and precision.
Benefits of SSRs:
- Silent operation (no clicking sound)
- High switching speed
- Long lifespan (no mechanical wear)
- Excellent for high-duty cycles
Why Use a Current Sensing Relay + SSR Combination
Achieve Automatic, Hands-Off Control
By pairing the two devices, you can automatically control a secondary load (such as a fan, indicator light, or secondary motor) whenever the main load draws current — no additional controllers are required.
Improve Safety and Reliability
This setup eliminates the need for direct human intervention and reduces wiring complexity. No more guesswork or remembering to flip extra switches.
Cost-Effective for E-Bikes, Scooters, and Small Systems
For applications such as electric scooters, e-bikes, or small workshop tools, this method avoids the need for expensive PLCs or microcontrollers while still providing precise control.
Choosing the Right Components
Selecting the Current Sensing Relay
| Factor | What to Consider |
| Load Type | AC or DC — choose a relay rated for your circuit |
| Trip Point | Make sure the adjustable range matches your load’s normal current draw |
| Contact Rating | Should handle the input current of your SSR (low power) |
| Response Time | Faster for applications like motor start detection |
Tip: If your scooter or e-bike motor has a large inrush current, pick a relay with a slight delay or adjustable hysteresis to prevent false triggering.
Choosing the Solid State Relay
| Factor | What to Consider |
| Voltage Rating | Match to your load’s voltage (AC or DC) |
| Current Rating | Must exceed your maximum load current by at least 20–30% |
| Heat Dissipation | Use a heatsink for high-current applications |
| Input Control Voltage | Make sure it matches the output of the current sensing relay |
Related Reading: Solid State Relay vs Mechanical Relay: Which is Better for Your Application
Wiring and Setup
Step-By-Step Wiring
- Identify the Load Circuit: Find the wire carrying the current you want to monitor.
- Install the Current Sensing Relay: Pass the load wire through the sensing window or connect terminals as required.
- Connect the Relay Output to the SSR Input: Use the NO or NC contacts depending on your control logic.
- Wire the SSR to the Secondary Load: Connect the line and load terminals according to the wiring diagram.
- Test the Setup: Power on, run the load, and verify that the SSR switches operate as intended.
Checklist for a Stable Setup
- Properly tighten all connections.
- Use shielded wires if there’s electrical noise.
- Double-check the trip point calibration using a clamp meter.
- Check SSR for proper heat dissipation (use thermal pad/heatsink if needed)
Troubleshooting Common Problems
False Triggering
- Lower the sensitivity or adjust the trip point
- Add a delay timer relay if needed.
Relay Does Not Trigger
- Verify the current is above the set threshold.
- Check for wiring polarity (especially on DC circuits)
- Confirm that the SSR input voltage is within specification.
Overheating SSR
- Add or upgrade heatsi.nk
- Ensure proper current derating (SSR should not run at 100% rated current continuously)
Conclusion:
Using a current-sensing relay to trigger a solid-state relay is one of the simplest ways to automate your circuit without adding complex electronics. By carefully selecting components that match your load type, setting the correct trip point, and wiring them securely, you can create a system that is safe, silent, and dependable.
Whether you’re controlling a fan, light, or secondary motor — or optimizing a setup for your electric scooter or e-bike — this approach keeps your system efficient and hassle-free. Take the time to calibrate and test your setup, and you’ll have a solution that works consistently for years to come.
Frequently Asked Questions
1. Can I use a current-sensing relay on both AC and DC circuits?
No, most relays are designed for either AC or DC. Choose one rated for your system.
2. Do I need a heatsink for a solid-state relay?
Yes, if you are switching high currents or running continuously, a heatsink is required.
3. How do I prevent false triggering from startup current spikes?
Use a relay with adjustable trip delay or add a time delay relay.
4. Can I use this setup for an electric scooter or e-bike controller?
Yes, as long as you size the relay and SSR properly for the motor current and voltage.
5. Are there solid-state relays with built-in current sensing?
Yes, but they are more expensive. The separate relay + SSR approach is more flexible and serviceable.